Wednesday, May 27, 2015

AOIT ART I FINAL EXAM PART 3

MOST SUCCESSFUL PROJECT: Light Drawings


DO OVER PROJECT: Anamorphosis

AOIT ART I FINAL EXAM PART 2


I communicate through my artwork

This artwork is basically expressing what I feel like inside my head, alone. I've been very distant from friends most of my life. I'm not very social, and usually I'm one to start the conversations, by asking them a question. And sometimes my friends ignore me.0.


AOIT ART I FINAL EXAM PART 1


For this picture I drew a Katana I found on the internet. There are some problems with it such as erasing the lines on it to make it look like it's actually coming off the paper. But overall I'm satisfied with my conclusion. I put the image of the Katana into photoshop and stretched it to make it look 3D. Then I drew it on a piece of paper (with the help of the grid) and put a shadow underneath it so it looks more believable.

For this picture, I made a shadow of someone's true self. I think it was pretty good. There are some improvements I would want to make but overall; I'm satisfied with the conclusion. I took Sho Minamimoto from the video game The World Ends with You, and put his battle sprite, Leo Cantis, as the shadow in the background.

Thursday, May 14, 2015

Animation

Drawing Animation

Today in Art we were making animation using images we cut out yesterday. Here's mine

Tuesday, May 12, 2015

12 days of Photoshop

On the First day of Photoshop, Mr. Sands taught us.
how to do cut outs

On the Second day of Photoshop, Mr. Sands taught us.
How to make a shadow.

On the Third day of Photoshop, Mr. Sands taught us.
How to make a body part mashup

On the Fourth day of Photoshop, Mr. Sands taught us.
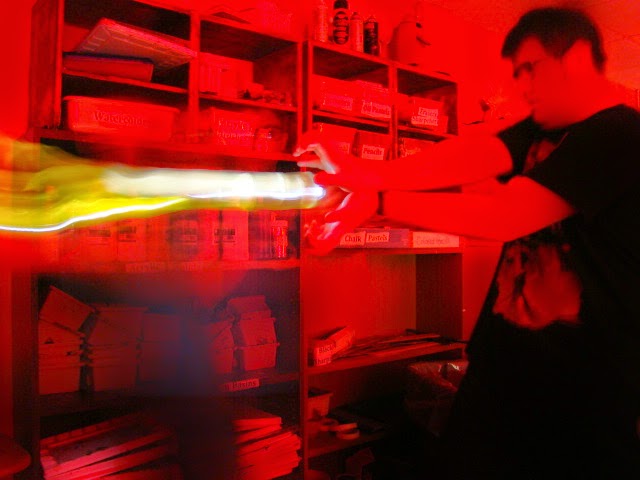
How to make literal interpretation images.

Moonstruck

Man cave

Crossbow

Black mail

Baseball bat

On the Fifth day of Photoshop, Mr. Sands taught us
How to make an animation

On the the Sixth day of Photoshop, Mr. Sands taught us
How to make a movie poster parody

On the seventh day of Photoshop, Mr. Sands taught us.
How to make a mash up

On the Eighth day of Photoshop, Mr. Sands taught us.

Monday, May 11, 2015

Children's monsters

Earlier in April we started to make models of the drawings of children's monsters.

Here is what the original looked like

and here is what mine looked like.

We started by sketching our own versions of the monsters. Which I can't find the image of. Then we started to model them out of clay, after that we put them in the kiln and we started to work on the box art. After we got all the sides done (except for the top and bottom), the monsters were all good to paint. After we painted them, we sprayed the boxes with spray paint, we then glue the labels on and made an opening to the box with clear plastic.

Then we put the monsters in the boxes and covered the boxes in a plastic wrap. And used an heat gun to remove all the access air in the boxes to send back to the kids who made them.

Optical Illusions

An optical illusion is an image that makes you think one thing, but in reality it actually the opposite. Like seeing two pencils are different heights with one longer and the other shorter but when you put them side by side, they are the same height. This is similar to something we did on Monday May 5th 2015.

We started making optical illusions using Photoshop. On Monday, we started by taking an image, putting it in Photoshop, then we stretched it vertically upwards, then we stretched the top two corners stretched horizontally left and right. After that we printed the picture. The day after that, we made a grid on the piece of paper with the image on it, after that we got a second piece of paper, to make another grid on it. to copy the image on. We then drew the image on to the second piece of paper and then colored it. Then we cut part of the paper so that the image looks like it's in 3D. And finally for the finishing touch, we added a shadow under the image to make it look realistic.

Here's mine

Wednesday, April 22, 2015

Post-it Note Project

On April 13 to April 16, We created 2 different post it note posters. One was of Morgan Freeman, and the other was Paul Walker. Here are their pictures,


We took each of the images into photoshop, grayscaled them, added the colors of the post it notes, and pixelized them both. Which let's us put post it notes on the back drop, in relation to where the pixels.

Wednesday, March 18, 2015

Illustrations

The Illustrations were used with acrylic paint to make something like a book cover, here's mine.

I used a combination of black and blue with a little bit of red to create the background because a black space would jest be boring. So I designed the background like a nebula and used white spray paint for the stars. For the moon and planet I used a tracer then used spray paint for inside the tracer. Some of the spray paint for the planet started to drip so I got a paper towel and dabbed the planet to make it look like it has craters on it. And lastly for the rings, I got brown and light yellow acrylic paint to give it rings like Saturn (which are made up of ice and dust).

Personality Portrait, Newimal, and Light Painting

Personality Portrait

The Personality Portrait is a project for AOIT Art I where you take a frame and insert yourself into it with photoshop. This is my portrait.
I used a vortex for inside the frame to act like I'm falling into it.

Newimal

The Newimal was where we took our animal from the biology project and combined it with a different animal. Here's mine
My animal was the black bear, so I used the polygonal lasso tool to cut everything around the bear head then put it on the black sheep. The ears of the sheep were sticking out, so I used the clone tool to select the flowers behind the sheep and placed them over the ears. I call it the SHEEP BEAR!

Light Drawing

The Light Drawing was used with force perspective. We had a camera take everything that happened in a couple of seconds and everything that happens in those few seconds happens in the picture at once creating a cool image. Here's one with me.

I look so cool

Thursday, January 29, 2015

Cartoon Blog

Cartoon Skeleton

The cartoon skeleton was used to find how a character would move. Here's mine:

I drew Monkey D. Luffy, the protagonist from the anime One Piece. I was wondering how I should of drew his bones because his ability of being made of rubber, but I really like it (the skull could use some work though).

Comic strip

The comic strip project was used to create a form of media that was entertaining. Here's one of the last panels of mine.

I gave my comic a manga/anime feel with the character design. Sorry that you can't see all of it.

Editing out selves with a Cartoon Character


On Wednesday January 28, 2015 We edited ourselves with a cartoon character of our choice. This is what mine looked like;


I put myself running towards Monkey D. Luffy from the anime One Piece in his second gear form. There are some problems to it, but overall I like the way it looks.